Enter the hostname into the quick connect bar's Host: field, the username into the Username: field as well as the password into the Password: field. You may leave the Port: field empty unless your login information specifies a certain port to use. Now click on Quick connect.
This is a (fictional) login data – we can use our own data instead if we want to.
Hostname: example.org
Username: john
Password: 7PjU#.J3
Note: If your login information specifies a protocol like SFTP or FTPS, enter the hostname as follows: sftp://hostname or ftps://hostname respectively.
Step 3:
Go to File→ Site Manager→ select P2staging→click on connect
Then click on view messages on the tab which is on the left
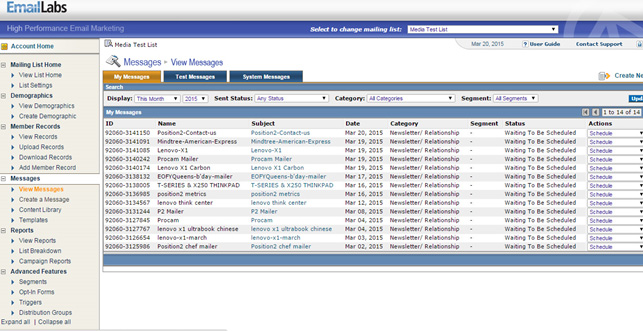
Step 12:
On the top right there is a link for create new messages, click on that…
Step 13:
Give message name and subject line both must be same, then click on save and next
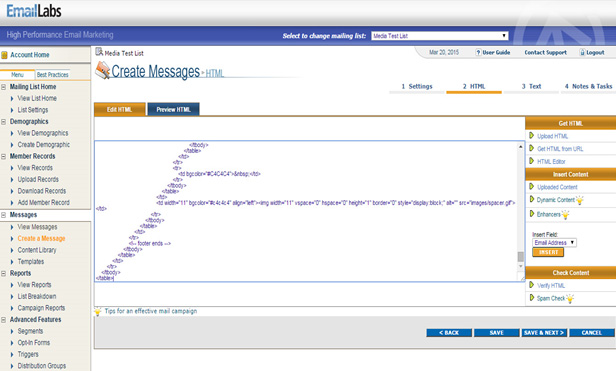
Step 14:
Then copy the html code from sublime and paste it in the window given, then click on save and next, clicking on preview html will show the output for the html code….
Step 15:
Give text as test mail, preview text will display the text. Then click on save and next.
Step 16:
And click on save and finish.….
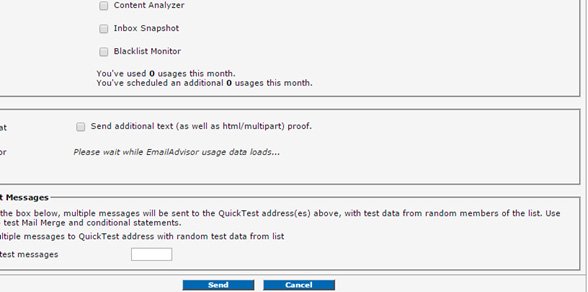
Step 17:
Message list will be shown click on actions drop down and select quick test and click go button….
Step 18:
Give mail ids of different clients like, Gmail, yahoo, outlook, live etc…….. And click on send…….
After sending it redirects to the same view messages page, we can select edit from drop down list and change the html code as well……..


